
My son has a keen sense of design already, and he often comes up with ideas of models I should help him to create. My usual answer is that he needs to make a blueprint for it so I can be sure that I understand what he means. It also helps him to think about the problem from a realistic point of view. If he can’t describe it well, that also means that I can’t understand what he means.
This time he came with an idea for a question block from Super Mario which has a lid that can pop open. He made a step-by-step blueprint for it which describes the design from all different orientations, and also shows how the latching mechanism works. He opted for a design which uses a spring to move the parts, and I challenged it due to the unreliability of it. Platforms with springs can easily get jammed as it is very difficult to assert even force on a wide area with springs. I love to use magnets in my designs, so we had a good discussion about how magnets could achieve the same effect on a much smaller area. He was sceptical if it was possible to do it the way I described it, but we agreed that I’ll give it a go.


In addition to the lid which pops up, the handle at the bottom is also removable. To pop the lid open, you need to twist on the handle. I added magnets there as well to make the indexing easier when you are attaching it. Without the handle, it is impossible to open the block without tools.
I of course had to make one for the little sister too, and she chose to have a heart design instead of the usual question block.


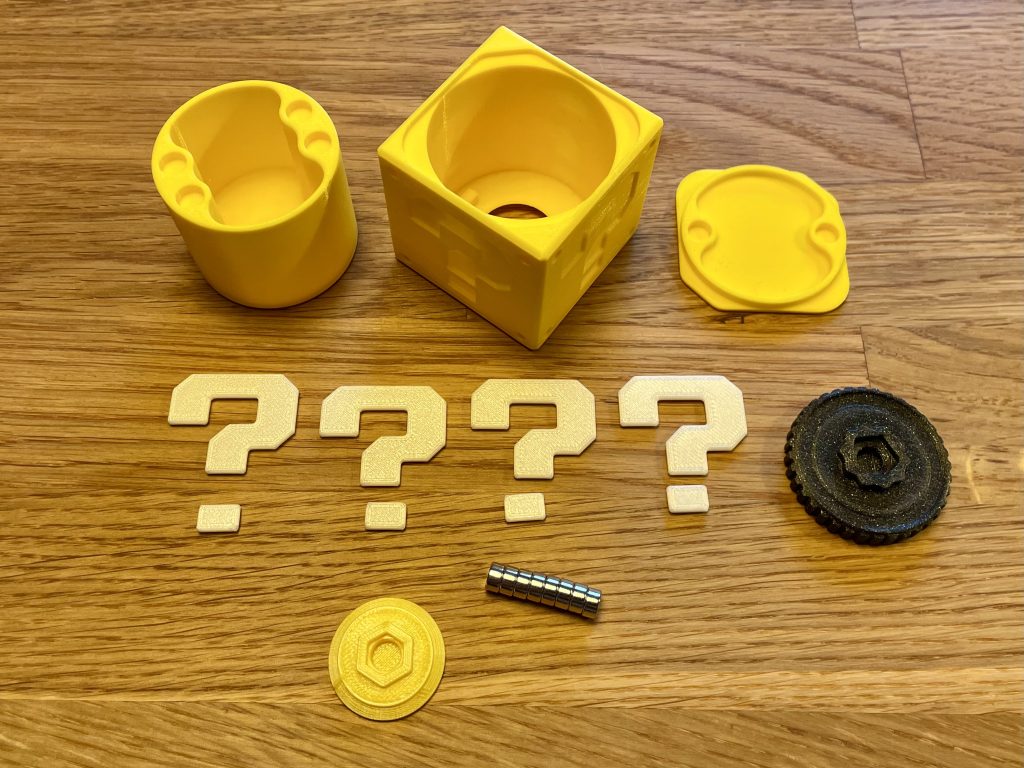
Starting from the top left: (1) inner cylinder which rotates inside the (2) frame. (3) lid with magnets.
The middle row: (1) Question marks to be attached to the sides of the frame. (2) handle to twist the cylinder.
On the bottom: (1) Connecting piece between the cylinder and the handle. This also makes sure that the cylinder doesn’t fall out. (2) eight 6mm x 3mm magnets. Six magnets are needed for the lid mechanism and two for indexing the bottom handle.


